Showing posts with label diy. Show all posts

A Collection of Easy DIY's for a Gold and White Christmas

Sunday, December 14, 2014

First a disclaimer: I didn't do any of these crafts myself, but given the popularity of gold and white, I thought these ideas would be an easy way to get the look for anyone!


I love to decorate with bare branches. Year round.  The textural contrast  between the branches and the ornaments works perfectly.

You can also glam up your branches with a little gold spray paint.  I can think of a million places to use these.


It doesn't get much easier than this.  Grab a few gold and/or white ornaments and put them on a cake stand or in a bowl. Done and done. 


White candles, gold glitter, gold candle holders.

Find the super easy tutorial for these gold dipped feathers here.

And my personal favorite
Tutorial here.

Nine more shopping days.

The Green Room Interiors provides Interior Decorating and Design Services in Chattanooga, TN. If you'd like to experience the joy of living in a well designed home, contact Kim Lemmon at 423.653.3186 or email thegreenroominteriors@gmail.com


One Room Challenge - My Hall Bath Reveal

Thursday, November 6, 2014

It's done!  For the most part.  I know you're visiting lots of blogs today so I'll be light on the words and heavy on the photos.

Before we get to the "after" shots, I thought I'd share a photo of my hall bath when we bought our house 3 years ago.


Not so cute. And while we did tear out and replace the tile in the bathtub surround and the floor before we moved in, our little makeover stalled out until the One Room Challenge came around.

So, though the magic of wallpaper, paint, a little vision and the husband's renovation skills, I'm thrilled to share my hall bath "after" photos with you!


 I repurposed an antique buffet I've had for a while but had no use for until we decided to transform it into a bathroom vanity.  We only lost the use of the top drawer so not only is the piece unique, it offers plenty of storage. 


I'm so proud of myself for getting this shot (above).  I literally set the timer on my camera, held it against the opposite wall and hoped for the best.  But wait, first take a moment to bask in the glory of that flame mahogany.  So gorgeous!


The shower curtains and valance were made from off the rack curtain panels.  We added grosgrain trim to the curtain panels and my workroom made the valance out of a third panel. The bamboo shade came with me from a former house.  Lucky fit!  The palm frond chandelier is vintage - I painted it gold myself.


So you know how I love a good mix, right?  Since my buffet/vanity (buffity?) is so classic, I wanted to contrast that with a little bit of mod, and I knew this mirror would be perfect. Isn't it though?  It was dark wood when I bought it but I sprayed it gold then painted over that with Liquid Leaf.  

Thanks to all of your input I decided against the vessel sink, because lots of you warned me that they were not so user-friendly - so in this case functionality won out.  I went with a polished chrome faucet because it's timeless and transcends trends.


And I love the little glimpses of my antique mirror wall. 


Most everything in this shot I've had.  The stag sconce is antique.  I've had it for at least 5 years but never could find the right place for it.

The turquoise lamp is vintage too.  Floor tile is readily available from the shelves of Home Depot and it's budget friendly.  I chose it because I like how clean the white looks in a bathroom and the geometric pattern feels old and new at the same time. The wallpaper is Brunschwig & Fils Le Grand Palais.


Thanks for taking the time to visit today.  I'd love to know what you think about my bathroom makeover!

Thank you to Linda for creating and hosting the One Room Challenge.  You can find links to all of the participants here and here.

The Green  Room Interiors provides Interior Decorating and Design Services in Chattanooga, TN.  If you'd like to discover the joy of living in a well designed home, contact Kim Lemmon at 423.653.3186 or email thegreenroominteriors@gmail.com

One Room Challenge Week 4 - A Little More Progress

Thursday, October 23, 2014

Welcome to this week's installment of the One Room Challenge.  In case you're not familiar, this is the event created by Linda from Calling It Home where participants make over the room of their choice in six weeks sharing their progress once a week along the way. I have been linking up with the makeover of my hall bathroom.  Week 4 is always tough,  and I feel like I haven't completed nearly as much as I had hoped to at this point.  

Remember last week when I shared that I was planning to do a wall of antiqued mirror tiles behind my vanity?  The good news is I got all of the mirrors successfully antiqued and I'm  pretty happy with how they turned out.


The not so good news is that we haven't had a chance to install the tiles on the wall yet.  :-( .

In other news, the wall repair has been a huge undertaking.  There has been sanding and more sanding followed up by more sanding. And you know how awful that superfine sheet rock dust is. My husband came out of the bathroom on Sunday looking like a powdered donut.


Here's something positive. The box molding has been added to the lower third of the walls (Yay)


and I'm thinking that rather than painting it out white, I'm may just paint  the wainscoting a shade of blue that's slightly darker than the blue in the wallpaper.


Benjamin Moore Buxton Blue in particular.  What do you think about that idea?  Do you like the idea of painting the wainscoting blue or would you paint it white?

I'm also struggling with whether to go with a vessel sink or a drop-in sink for my antique piece turned bathroom vanity.  Originally I had planned go with a drop-in sink but after consulting with Professor Pinterest, I think the vessel sinks look so much better in this situation. Look:


Don't you agree?  I think the vessel sink looks so much better.  

This is all of the progress I have to share with you today.  Things should really start to come together next week (really!) as the mirror wall will be installed, the rest of the trim will be installed and painted, and I'm hoping to get the paper up and the vanity placed. It's an ambitious list.

Say a quick prayer for me and be sure to tune in next Thursday.  To find the links to all of the other participants, click  here and  here .


One Room Challenge Week 3 - Not Pretty Yet

Thursday, October 16, 2014

Hello and welcome back!  Today I have a little update for you on the progress of my hall bathroom makeover as part of  The One Room Challenge Linking event - the one where participating bloggers make over a room in 6 weeks posting weekly updates along the way.

I've made a little progress in my bathroom and unfortunately it's not the type of progress where the pretty has started to happen.  It's the kind where we've done more of the behind the scenes work that will allow us to layer on the pretty.

You may recall my bathroom still had the original 1972 vanity complete with it's limey green cultured (fake) marble top. Well, that thing is so out of here!


and soon will be replaced by this old sideboard as new vanity.


That's the best pic I could get since it's currently somewhat buried in my holding area. And no, the flame mahogany will most definitely not be painted upon.

But before the buffet/vanity can get installed, I've got to finish up this project-let that's underway


Those are 12x12 mirror tiles purchased from The Home Depot that I'm attempting to antique so they'll look something like this.


If all goes according to plan, this antique mirror wall will be happening on the wall behind my vanity.

So that's all I have to share today. I'm feeling a little nervous about our slow progress thus far, but I'm determined to get this finished up in time for the reveal in three weeks!  

Thanks for checking in on my progress and please make sure you visit the other participants too!  You can find links to all of the projects on our hostess Linda's blog here and here.

Follow along with me on InstagramPinterest, and Facebook!


ORC Linking Event - I'm Doing My Hall Bath

Thursday, October 2, 2014

It's time to clear the cobwebs off of the ol' blog and start cranking out some serious decorating posts.  As you may have guessed, I've decided to join in on the internet's biggest decorating sensation - The One Room Challenge.

I'm participating in the Link-up event which airs for the next 5 consecutive Thursdays, so for goodness sake please come back to check in on my progress!  I need your feedback and encouragement! Mostly because of this ridiculousness:


Enter aforementioned hall bath in its current state.

As you can see it's crying out for help.  In a big way. Those walls.  They look like this because a few weeks ago I spent hours stripping off the top layer of wallpaper only to find ANOTHER layer of old wallpaper combined with unsized skim coated sheet rock in other areas.  Holy. Wallpaper. Hell.

This is what happened where the wallpaper was applied to a skim coat of bare sheet rock mud.


It totally damaged the sheet rock underneath.  I know what you're thinking.  "Thank goodness you have that pretty mirror".  True, but a lot of hard work needs to happen before we can revel in the goodness of the mirror.

And rather than do up an inspiration board, I'm going to drag you down this road with me one post at a time because some decisions have yet to be made.  

Before you go, let's have a look at some bathrooms that are inspiring my little makeover shall we??


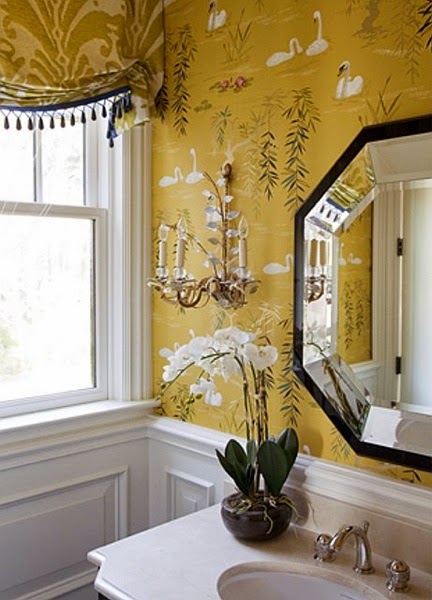
Yes, there will be wallpaper in the damask category. And it's super gorgeous because that's what Brunschwig & Fils does.   I gave you a sneak peek here.


And no ORC makeover of mine would be complete without repurpose-ing a piece or two of vintage furniture.


This is so gorgeous it takes my breath away. And it makes me wish I had been born with the "understated" gene.  But let's not kid ourselves.  We're more likely to see something with more color, pattern and layers. 

and I'm okay with that.

So, same time next Thursday???

You can find links to all of the other participants on Linda's  (our hostess and mistress of ceremonies) blog here.  And in case you missed the ORC participants that posted yesterday, find those links here.  Hours of entertainment.  Literally.

PS.  I'll likely be posting little updates on my Instagram feed so let's buddy up.


One Room Challenge Week 4 - Brass & Glass Pagoda Chandelier Makeover

Thursday, April 24, 2014

Okay so I missed posting my progress last week.  Rest assured that even though I didn't get a chance to post everything that went down over here, I have been making sweet progress in my living room/dining room makeovers. That DOES NOT mean that I still don't have major concerns about getting the room to full completion on time.  I'm at the mercy of my upholsterer for a few things and he's pretty covered up right now.

In any case I'm going to put my worries aside and share a little progress I've made in the dining room.  And there's a DIY involved that meets two major requirements.  It's quick and easy.

So I have your attention now?  Meet my circa 1970 something brass and glass chandelier that was practically free at my Habitat for Humanity store.

I'm sure it's no secret why I was drawn to this fixture. (Hint: It starts with a "p" and rhymes with "lagoda.")  Of course I love that! But what I wasn't crazy about was the highly lacquered brass finish. I wanted something warmer and softer, but still gold.

I'm sure you already know where we're going with this.
After removing the glass I quickly and not so carefully applied rub n buff to all brass parts that I could see well enough without my reading glasses on.


I'll give you that the change at this point is subtle.  But we're not done yet. I thought it might be fun to update the glass by doing an antique mirror finish on the glass panels.  I've seen a number of tutorials on Pinterest and then again on Little Green Notebook.  

So I laid the glass panels face side down on a tarp and sprinkled them with a mixture of water and vinegar.  I didn't measure how much of each.

Then I sprayed them with this stuff (found on the shelves of my local Wal-Mart)


See how the vinegar/water solution lays on top of the glass?  Just grab a paper towel and blot/lightly wipe it off. 


As a final step I  sprayed on a coat of black to "age" those bare spots.

And then it was just a matter of reassembling the chandelier.


And all put back together and lit up.

Told you it was quick and easy!!

Thanks for checking in on my progress! 

And 2 weeks to go!! Yikes! (x 2)

The Green Room Interiors provides Interior Decorating and Design Services in Chattanooga, TN.  If you'd like to discover the joy of living in a well designed home, contact Kim Lemmon at 423.653.3186 or email thegreenroominteriors@gmail.com


Night Stand Makeover for a Good Cause

Thursday, August 29, 2013

Who's ready for a three-day weekend?!?  Before we part ways for the Labor Day Holiday, I wanted to share a little furniture makeover I just finished up.  

A few weeks ago I got a call from Cynthia at  the Home Builders Association of Greater Chattanooga  (HBAC).  The HBAC is putting on a remodeling show in September and she contacted me because they are including a charity auction to benefit Special Spaces Chattanooga.  What is Special Spaces?  They're a non-profit organization that helps children facing terminal illnesses by creating and implementing beautiful bedrooms for them. For such a worthy cause, I jumped at the chance to participate.  They even provided the furniture for me to re-create, which will be auctioned off for Special Spaces.  

Now this is where I hang my head in embarrassment a little.  I forgot to take the expected "before" photo.  Problem is, when I decide to tackle a new project it's usually while I have 3 other things going on at the time - like dinner, laundry, social media maintenance, and - oh yeah- I need to start that night stand project.

Here's the point at which I remembered to take a photo.

You guys are visual people, so I know you can imagine this piece in its original golden brown glory.

I honestly didn't know what I was going to do.  Just painting in a pretty color didn't seem like enough, and even though this piece is for charity, I wanted to do something with it that reflected my aesthetic, which is a little more embellished.

I started with a coat of gray paint (Benjamin Moore Gray Wisp) and taped off a big stripe down the middle.  I also painted the polished nickel hardware with gold leaf paint.


Better, but I'm a "more is more" kind of person.  Inspiration hit me in the aisle of Big Lots when I spotted these
Of course!  I was going to incorporate the sunburst design that's in my logo.  
More Gold Leaf paint was used.  I painted up a bunch of those bamboo skewers, set aside my fears and started gluing.  (Elmer's Wood Glue, if you're taking notes)

And here's the finished piece...


A big thank you to Cynthia and the Home Builders Association of Greater Chattanooga and also to Special Spaces Chattanooga for giving me the opportunity to participate.

If you'd like to learn more about the HBAGC Home & Remodeling Expo Sept 14-15, click here.  I'll also have a booth at the Home & Remodeling Expo that weekend, so bring me those paint and fabric swatches you've been obsessing over for months.

Have a relaxing, happy Labor day weekend!

The Green Room Interiors provides Interior Decorating and Design Services to happy homeowners in Chattanooga, TN.  If you'd like to experience the joy of living in a well designed home, contact Kim Lemmon at 423.653.3186 or email thegreenroominteriors@gmail.com